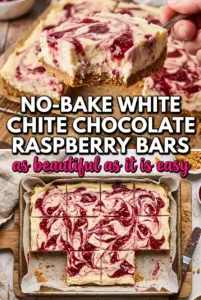
Creamy white chocolate cheesecake bars with a bright raspberry swirl disappear fast because they hit that sweet spot between rich and fresh. The filling sets up soft and sliceable, the crust stays firm enough to hold its shape, and the raspberry ribbon cuts through the sweetness so each bite tastes balanced instead of heavy.
What makes these bars work is the texture contrast. Whipped cream lightens the cheesecake base so it doesn’t eat like a brick, and the melted white chocolate gives the filling a little extra body once it chills. The raspberry sauce needs to be cooked down long enough to lose its raw edge, then cooled completely so it doesn’t melt the filling when you swirl it on top.
You’ll find the small details that keep the bars cleanly layered, plus the one chilling step that matters most if you want neat squares instead of a soft mess on the plate.
The raspberry swirl set up beautifully and the bars sliced clean after an overnight chill. The white chocolate made the filling taste extra smooth, not overly sweet.
Save these no-bake white chocolate raspberry cheesecake bars for the dessert table when you want something creamy, pretty, and make-ahead friendly.
The Chill Time That Gives These Bars Their Clean Slices
No-bake cheesecake bars live or die by the chill. If you rush them, the filling will look fine in the pan and fall apart the second you lift a square. The crust needs that first 20-minute chill so it firms into a real base instead of turning sandy under the filling, and the cheesecake layer needs several hours in the refrigerator so the whipped cream and white chocolate can settle into a sliceable set.
The raspberry swirl also matters more than people think. A sauce that’s still warm will sink and blur into the cheesecake layer. Cool it until it feels room temperature at the least, then dot it over the top and swirl gently with a knife so you keep those bright streaks instead of turning everything pink.
- Graham cracker crumbs — Finely crushed crumbs pack together better and give you a crust that slices cleanly. If you’re crushing them yourself, pulse until they look like damp sand with no big shards left behind.
- Unsalted butter — This is the glue that holds the crust together. Salted butter works in a pinch, but the flavor is cleaner with unsalted butter because the filling already has plenty going on.
- Cream cheese — Full-fat blocks give you the best set and the smoothest texture. Spreadable tub cream cheese is too soft and often contains more water, which makes the bars loose.
- White chocolate chips — Melted white chocolate adds sweetness and structure. Use a brand that melts smoothly; if yours tends to seize, melt it slowly and let it cool for a few minutes before beating it into the cream cheese so it doesn’t clump.
- Heavy whipping cream — Whip it to soft peaks, not stiff peaks. Soft peaks fold into the filling without deflating and keep the bars lighter on the tongue.
- Fresh raspberries — Fresh berries give the sauce a brighter flavor and better color than most frozen berries, which can release more water. If you use frozen, cook them a minute or two longer so the sauce reduces properly.
Building the Layers Without Losing the Swirl
Pressing the Crust So It Holds
Mix the graham cracker crumbs with the melted butter until every crumb looks damp, then press the mixture firmly into a lined 9×9-inch pan. Use the bottom of a measuring cup to compact it all the way into the corners, because a loosely packed crust crumbles when you cut the bars. Chill it for the full 20 minutes so the butter firms up before the filling goes on.
Cooking the Raspberry Sauce Down Properly
Simmer the raspberries, sugar, and lemon juice until the berries break down and the mixture looks glossy and slightly thickened, about 5 minutes. If it still looks thin and watery, keep it on the heat a little longer; a loose sauce will bleed into the cheesecake layer. Strain it and cool it completely so the swirl stays distinct and the bars hold their pale filling.
Whipping the Filling to a Smooth Base
Beat the softened cream cheese first until it’s completely smooth, with no little lumps hiding at the bottom of the bowl. Add the melted white chocolate, powdered sugar, and vanilla, then mix again until the batter looks satiny. Fold in the whipped cream with a spatula so you keep the air in it; if you stir hard at this stage, the filling gets dense instead of creamy.
Swirling and Setting the Bars
Spread the filling over the crust in an even layer, then drop spoonfuls of cooled raspberry sauce across the top. Drag a knife through the sauce in a few slow passes; too much swirling turns the whole top muddy, while a few deliberate figure-eight motions leave the prettiest pattern. Chill the bars for at least 4 hours, but overnight is better if you want tidy edges.
Three Ways to Adapt These Cheesecake Bars
Gluten-Free Crust
Swap the graham crackers for certified gluten-free graham crumbs or a gluten-free cookie crumb with a similar dry texture. Keep the butter amount the same. The bars will taste a little different depending on the cookie, but the filling and swirl stay exactly the same.
Dairy-Free Version
Use plant-based cream cheese, dairy-free whipped topping, and a dairy-free white chocolate substitute if you can find one that melts smoothly. The texture will be a little softer and less rich than the original, but the bars will still chill into neat squares if you give them enough time.
Extra Raspberry Swirl
If you want a sharper berry layer, keep a few spoonfuls of the cooled sauce aside and serve it on the side. That gives you a brighter fruit hit without watering down the filling, and it works well if the bars are going on a dessert platter.
Storage and Reheating
- Refrigerator: Store covered for up to 5 days. The crust stays sturdy, though the raspberry swirl softens slightly at the edges after day 2.
- Freezer: These freeze well. Cut into bars, wrap individually, and freeze in a single layer before moving them to a container. Thaw in the refrigerator so condensation doesn’t make the tops wet.
- Reheating: No reheating needed. Serve straight from the fridge for the cleanest texture; if they sit at room temperature too long, the filling gets too soft and the layers lose definition.
Answers to the Questions Worth Asking
No-Bake White Chocolate Raspberry Swirl Cheesecake Bars
Ingredients
Equipment
Method
- Mix the graham cracker crumbs with the melted butter until evenly coated, then press firmly into the bottom of a 9x9-inch pan to compact it.
- Chill the pressed crust for 20 minutes to firm it up before filling.
- Simmer the raspberries, granulated sugar, and lemon juice in a small saucepan over medium heat for 5 minutes, until the berries break down and the mixture looks syrupy.
- Strain the sauce through a fine mesh sieve, then let it cool completely so it doesn’t melt the cheesecake layer.
- Beat the softened cream cheese with the melted white chocolate, powdered sugar, and vanilla extract until smooth.
- Fold the whipped heavy cream into the cream cheese mixture until no streaks remain, keeping it light.
- Spread the cheesecake mixture over the chilled crust and smooth the top.
- Drop spoonfuls of raspberry sauce over the surface, then swirl gently with a knife for a marbled pattern.
- Chill the bars for at least 4 hours, or overnight, until fully set and firm enough to slice cleanly.