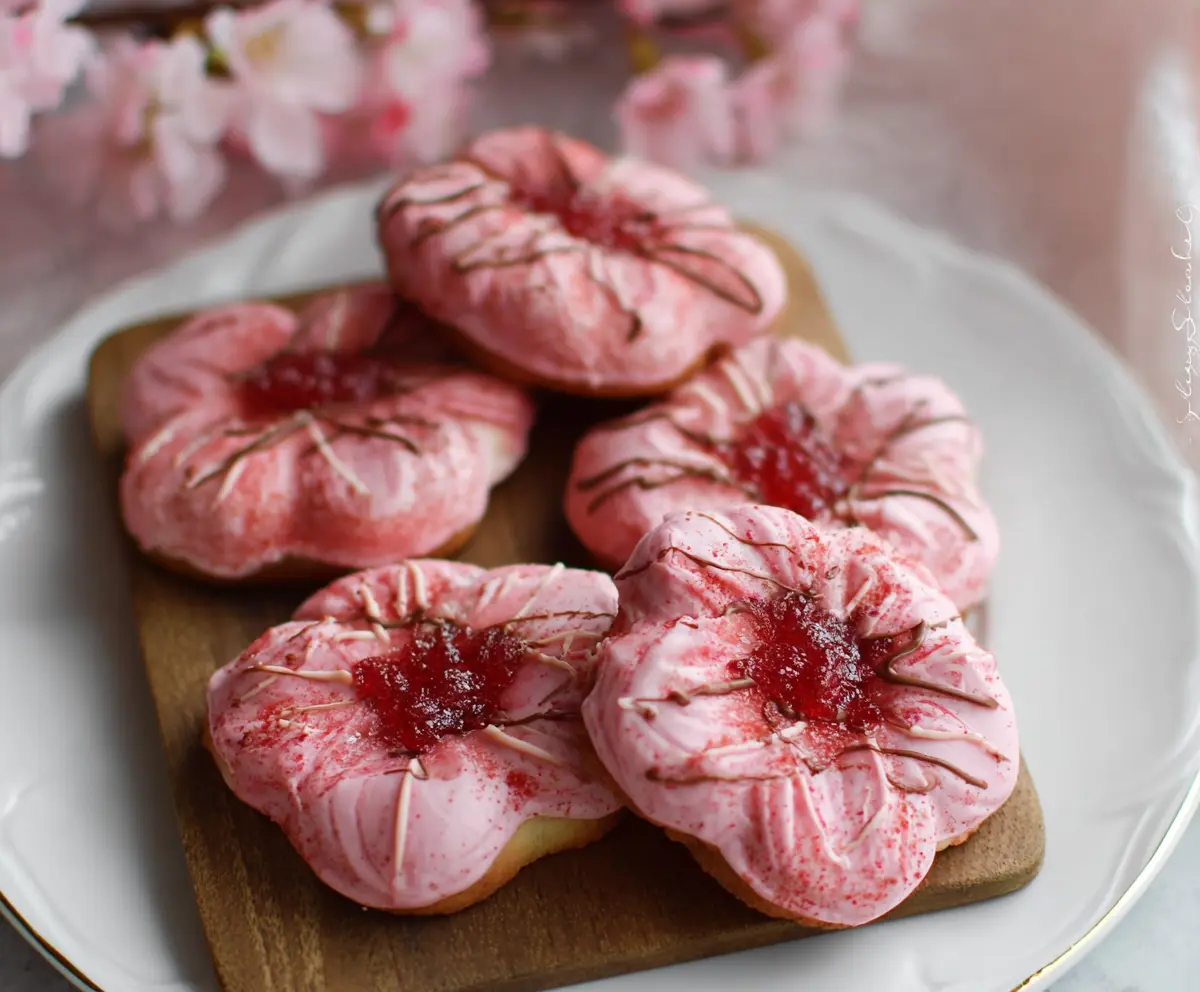
These Sweet Cherry Blossom Cookies are perfect little treats! With a lovely cherry flavor and a soft texture, they make for delightful snacks or gifts.
Baking these cookies is a breeze. The fun part? They look so pretty that you might just want to admire them before taking a bite! Who could resist? 😊
I love serving these cookies with a cup of tea—they complement each other perfectly. Plus, they’re easy to make, so you can whip them up anytime for a sweet surprise!
Key Ingredients & Substitutions
Flour: All-purpose flour is great for these cookies. If you’re looking for a gluten-free option, try using a 1:1 gluten-free flour blend. It works well without changing the texture too much.
Butter: Unsalted butter gives you control over the salt in your cookies. If you only have salted butter, just skip adding the extra salt in the recipe!
Cherry Jam: Cherry jam adds a wonderful fruity center. If cherries aren’t in season, feel free to use raspberry or strawberry jam for a different flavor twist that’s still delicious!
Pink Food Coloring: This is optional, but it gives the cookies a sweet look. You can achieve pink naturally by adding a bit of beet juice or simply leave it out for a classic look.
How Can I Create Perfectly Shaped Cookies?
Getting those lovely flower shapes requires a little technique but is quite simple! Here’s how to ensure your cookies look the best:
- First, roll the dough evenly to about 1/4 inch thick on a floured surface. A consistent thickness helps with even baking.
- Use a sturdy flower-shaped cookie cutter and make sure it’s well-floured to prevent sticking.
- After cutting your shapes, gently press down the center using a spoon. This creates a nice space for the cherry jam.
- Chill the cut cookies for about 10 minutes in the fridge before baking. This helps them hold their shape!
Following these tips will ensure your sweet cherry blossom cookies turn out beautifully every time!
Sweet Cherry Blossom Cookies
Ingredients You’ll Need:
For the Cookie Dough:
- 2 1/2 cups all-purpose flour
- 1/2 teaspoon baking powder
- 1/4 teaspoon salt
- 3/4 cup unsalted butter, softened
- 1 cup granulated sugar
- 1 large egg
- 2 teaspoons vanilla extract
- 2 tablespoons milk
- Pink food coloring (optional)
For the Filling and Decoration:
- 1/2 cup cherry jam or preserves (for centers)
- Pink or red powdered sugar or edible glitter (for decoration)
- Melted chocolate (for drizzling)
How Much Time Will You Need?
This delightful cookie recipe takes about 20 minutes for preparation, plus an additional 10-12 minutes for baking. After baking, allow the cookies to cool completely before decorating, which might take about 30 minutes. So, in total, you can have these lovely cookies ready in about an hour! Perfect for sharing or enjoying yourself!
Step-by-Step Instructions:
1. Prepare Your Oven and Baking Sheet:
Start by preheating your oven to 350°F (175°C). While it heats, line a baking sheet with parchment paper to prevent the cookies from sticking.
2. Mix Dry Ingredients:
In a medium bowl, whisk together the flour, baking powder, and salt. This will help distribute the baking powder evenly throughout the dough. Set this mixture aside for later.
3. Cream the Butter and Sugar:
In a large bowl, beat the softened butter and sugar together using a hand mixer or whisk until the mixture is light and fluffy. This step is crucial as it helps incorporate air into the dough, which results in tender cookies.
4. Combine Wet Ingredients:
Add in the egg and vanilla extract to the butter mixture, beating until everything is well combined. Make sure the mixture is smooth and creamy.
5. Mix the Dough:
Gradually add the dry ingredient mixture to the wet ingredients, alternating with the milk. Mix gently until a soft dough forms. Don’t over-mix; just combine until all ingredients are incorporated.
6. Optional Coloring:
If you’d like, add a few drops of pink food coloring to the dough. Gently mix until the color is evenly distributed, giving your cookies a pretty blush.
7. Roll and Cut the Cookies:
On a floured surface, roll out the dough to about 1/4 inch thick. Next, using a flower-shaped cookie cutter, cut out cookies and place them on your prepared baking sheet.
8. Create Indentations:
With the back of a small spoon or your fingers, gently create a little indentation in the center of each cookie. This is where you’ll add the cherry jam later!
9. Bake the Cookies:
Bake in the preheated oven for 10-12 minutes, or until the edges are just lightly golden. Be careful not to overbake! Once done, take them out and let them cool completely on a wire rack.
10. Fill and Decorate:
After the cookies have cooled, fill each indentation with cherry jam. It should be a nice, generous amount to really get that cherry flavor in each bite.
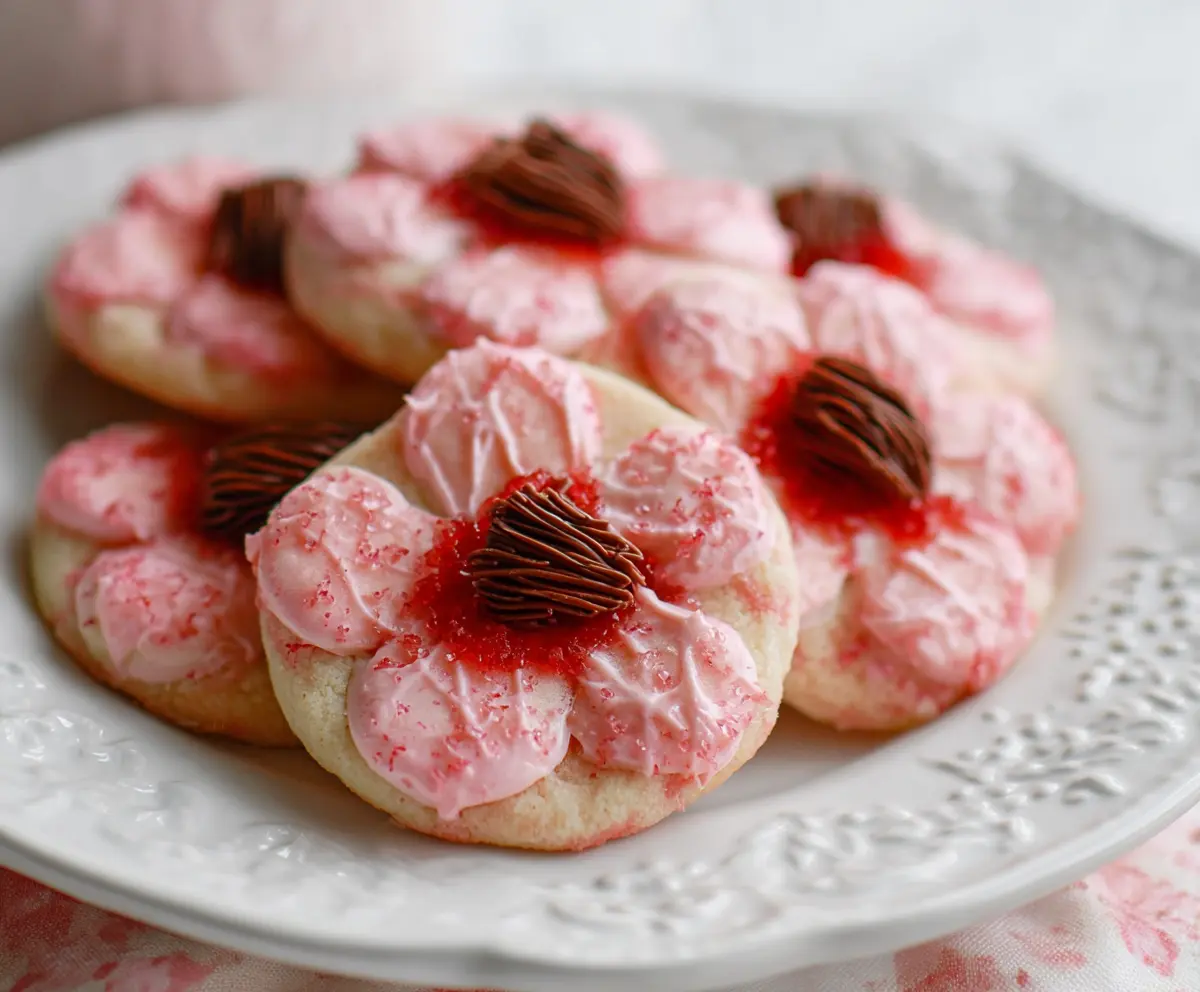
11. Final Touches:
Decorate the cookies with pink or red powdered sugar or edible glitter to give them a festive sparkle. Finally, drizzle melted chocolate over the tops for a beautiful finish. Let the chocolate set before serving!
12. Serve and Enjoy!
Now, gather your friends and family to enjoy your beautiful and delicious Sweet Cherry Blossom Cookies. They will surely be a hit at any gathering!
These cookies are not only delightful to eat but also a joy to look at, making them perfect for spring celebrations or anytime you need a sweet treat!
Can I Use Different Types of Jam?
Absolutely! While cherry jam gives these cookies a lovely flavor, you can substitute it with raspberry, strawberry, or even peach jam. Each will bring its own unique twist to the cookies!
What If I Don’t Have Pink Food Coloring?
No worries! The pink food coloring is optional for aesthetics. You can either omit it entirely for a classic look or use natural alternatives like beet juice for a hint of color. Your cookies will still taste great!
How Should I Store Leftover Cookies?
Store any leftover cookies in an airtight container at room temperature for up to 3 days. To keep them fresher longer, you can refrigerate them for about a week. Just let them come to room temperature before enjoying!
Can I Freeze These Cookies?
Yes, freezing works well! After baking and cooling, you can freeze the cookies before adding the jam and toppings. Wrap them tightly in plastic wrap and place them in a freezer-safe container. They’ll stay good for up to 3 months. Thaw in the refrigerator before decorating and serving!