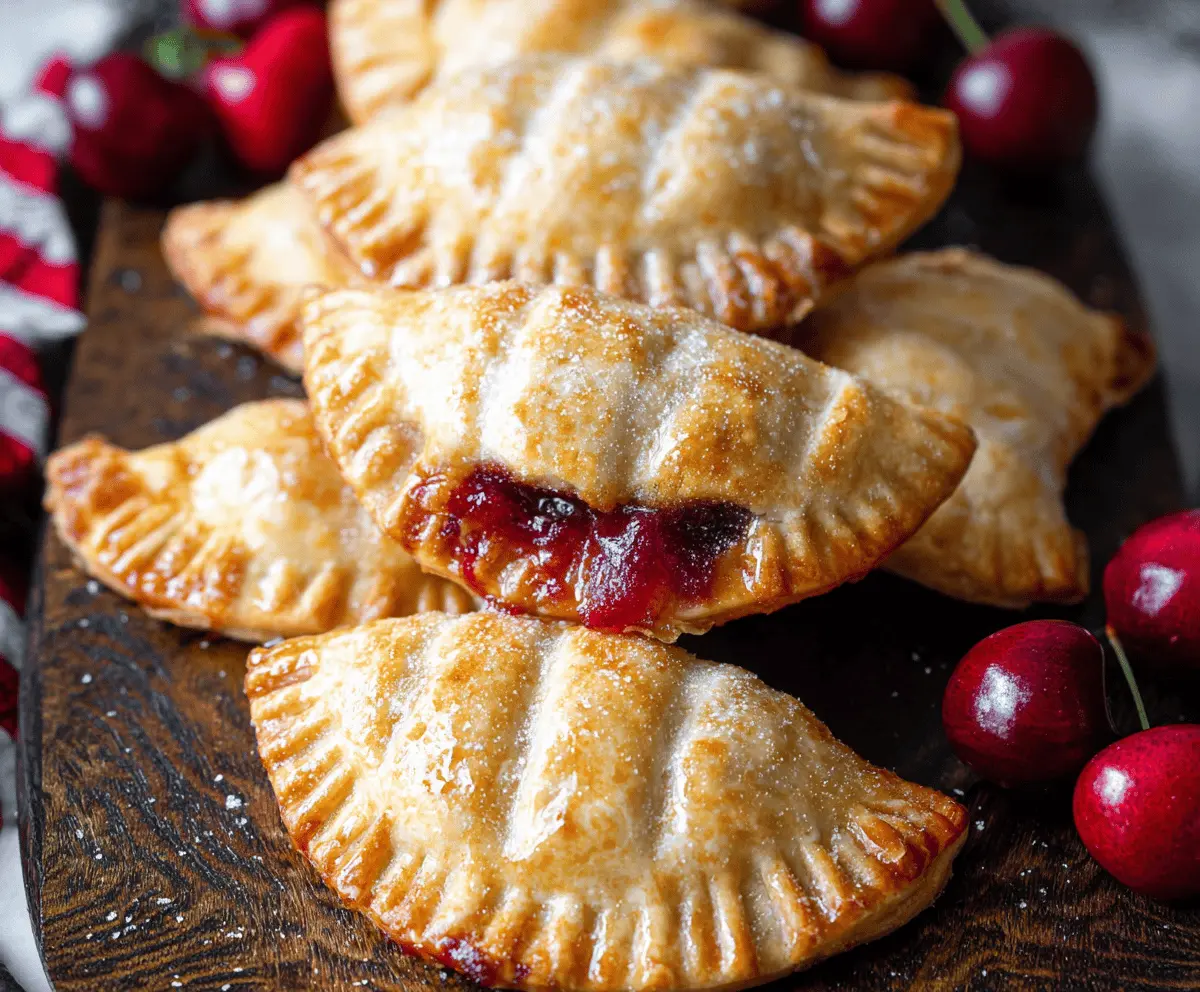
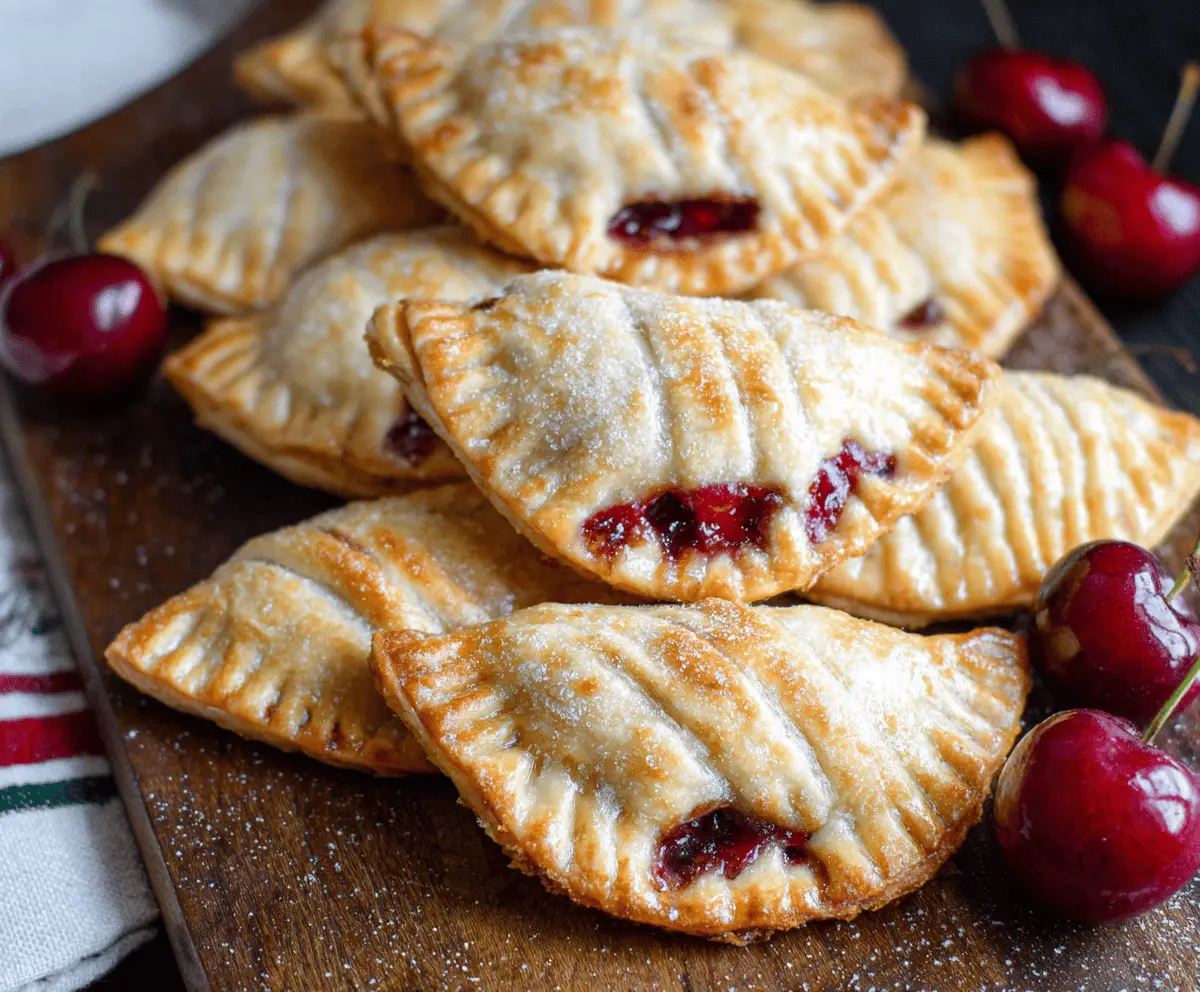
These Cherry Hand Pies are sweet little treats stuffed with juicy cherries, all wrapped in a flaky crust. Perfect for dessert or a tasty snack on the go!
There’s something fun about holding your dessert in your hand. Plus, they’re great for sharing—or not! Sometimes I keep them all to myself. 😄
Making these pies is easy. I just mix up the filling, fold it inside the dough, and bake. They come out warm and delicious every time, making my kitchen smell amazing!
Key Ingredients & Substitutions
All-purpose flour: This flour gives the crust its structure. For a gluten-free option, try a 1:1 gluten-free baking mix instead. Just keep in mind the texture might vary slightly!
Unsalted butter: Cold butter is a lifesaver for a flaky crust! If you’re out of butter, you can use chilled coconut oil or shortening, but it may alter the flavor a bit.
Cherries: Fresh cherries are fantastic, but frozen cherries work just as well. Be sure to thaw and drain them before adding to avoid too much liquid.
Almond extract: This is optional, but it adds a lovely depth of flavor. If you don’t have it, try vanilla extract instead!
Granulated sugar: Adjust sugar based on your cherry’s sweetness. For a healthier option, use honey or maple syrup in the same quantity.
What’s the Best Way to Shape and Seal Hand Pies?
Creating those adorable hand pies requires a few simple steps to make sure they look great and stay together. Here’s how:
- After rolling out the dough, cut it into circles and place a tablespoon of filling in the center.
- Ensure there’s enough space around the filling to seal; this helps prevent leaks.
- Fold the dough over the filling, creating a half-moon shape.
- Use a fork to crimp the edges. This not only seals the pie but also adds a cute touch!
Keep an eye on the edges while baking; it’s a good idea to brush them with the egg wash for a golden finish!
How to Make Cherry Hand Pies
Ingredients You’ll Need:
For the Crust:
- 2 1/2 cups all-purpose flour
- 1 cup (2 sticks) unsalted butter, cold and cubed
- 1 tsp salt
- 1 tbsp sugar (for crust)
- 6 to 8 tbsp ice water
For the Cherry Filling:
- 2 cups fresh or frozen cherries, pitted and chopped
- 1/3 cup granulated sugar
- 2 tbsp cornstarch
- 1 tsp lemon juice
- 1/2 tsp almond extract (optional)
For the Egg Wash:
- 1 egg, beaten
- Additional sugar for sprinkling
How Much Time Will You Need?
Preparing these Cherry Hand Pies takes about 25 minutes, plus an hour to chill the dough. Baking them will take around 20-25 minutes. So overall, plan for about 1 hour and 50 minutes, including chilling time. It’s worth the wait for these tasty treats!
Step-by-Step Instructions:
1. Prepare the Crust:
In a large bowl, mix together the flour, salt, and sugar. Add the cold, cubed butter, and with a pastry cutter or your fingers, blend until the mix looks like coarse crumbs. This will help create a flaky crust.
2. Make the Dough:
Slowly add the ice water, one tablespoon at a time, mixing gently until the dough holds together but isn’t sticky. Avoid overworking the dough—it should be soft but not sticky. Divide it in half, shape into disks, wrap them in plastic, and refrigerate for at least 1 hour.
3. Make the Cherry Filling:
In a medium bowl, combine the chopped cherries, sugar, cornstarch, lemon juice, and almond extract (if using). Toss everything together until the cherries are evenly coated, then set aside.
4. Preheat the Oven:
Preheat your oven to 375°F (190°C). Line a baking sheet with parchment paper to prevent sticking.
5. Roll Out the Dough:
On a lightly floured surface, roll out one disk of dough to about 1/8-inch thick. Use a round cutter (around 4 inches in diameter) to cut out circles. Repeat with the second disk of dough.
6. Fill and Shape the Pies:
Place a tablespoon of the cherry filling in the center of each dough circle. Fold the dough over to create a half-moon shape, and press the edges with a fork to seal securely.
7. Prepare for Baking:
Arrange the filled pies on your prepared baking sheet. Brush the tops with the beaten egg and sprinkle sugar over them for extra sweetness and sparkle.
8. Create Vent Holes:
Using a small knife, cut a few slits in the top of each pie to allow steam to escape during baking.
9. Bake the Pies:
Place the baking sheet in the oven and bake for about 20-25 minutes, or until the hand pies are golden brown and bubbly.
10. Cool and Serve:
Once baked, let the pies cool for a few minutes on the baking sheet before transferring them to a wire rack. Serve them warm or at room temperature, and don’t forget to enjoy every bite!
Enjoy your delicious Cherry Hand Pies with their flaky crust and sweet-tart cherry filling! Perfect for sharing—or keeping all to yourself!
Can I Use Frozen Cherries for This Recipe?
Absolutely! Frozen cherries work great in this recipe. Just make sure to thaw and drain them before mixing them with the other filling ingredients to prevent excess moisture.
How Can I Store Leftover Hand Pies?
Store any leftover Cherry Hand Pies in an airtight container at room temperature for up to 2 days. For longer storage, you can refrigerate them for up to a week or freeze them for up to 3 months. Reheat in the oven for best results!
What If My Dough Is Too Sticky?
If your dough feels sticky while rolling, sprinkle a little more flour on your work surface and on the dough itself. This will help you roll it out more easily without overly incorporating flour into the dough.
Can I Make The Dough Ahead of Time?
Yes! You can prepare the dough a day in advance. Just wrap it tightly in plastic wrap and refrigerate. When you’re ready to make the pies, let the dough sit at room temperature for about 10-15 minutes to soften before rolling it out.