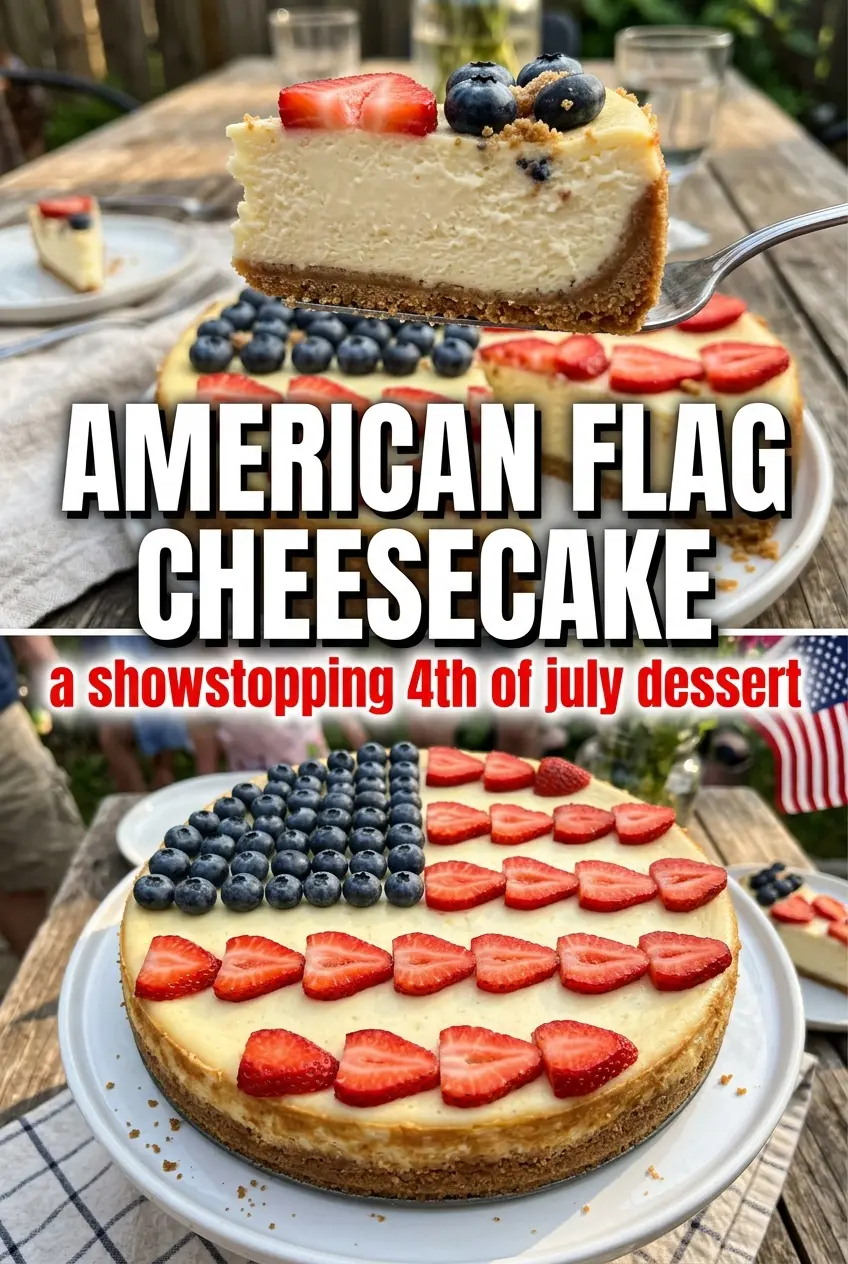
American flag cheesecake gets the kind of reaction that stops people mid-conversation. The crust stays crisp under a thick, tangy cream cheese layer, and the fruit on top turns it into a centerpiece without changing what matters most: a clean slice, a creamy middle, and enough structure to hold that flag design instead of sliding into a mess. It looks festive, but it still eats like a proper cheesecake.
The texture depends on a few small decisions. Softened cream cheese blends smooth only if the eggs go in one at a time and the mixer stays on low once the batter comes together. That keeps extra air out, which is how you avoid tall cracks and a grainy filling. The flour and sour cream help the cheesecake set with a little extra insurance, so the center finishes with a gentle jiggle instead of a loose wobble.
Below, I’ll walk through the part that matters most: how to know when it’s baked enough, how to keep the fruit topping neat, and what to do if you want to make it ahead for a party table.
The cheesecake baked up smooth with no big cracks, and the strawberry-blueberry flag looked so neat on the table. Mine needed the full chill time, but the slices held together beautifully and the crust stayed firm.
Pin this American flag cheesecake for a showpiece dessert with a crisp crust, creamy filling, and a neat berry design.
The Crack-Free Cheesecake Comes Down to Mixing Less, Not Baking Longer
The biggest mistake with cheesecake is treating the batter like cake batter. Once the cream cheese is smooth and the eggs are added, more mixing just whips in air. That air expands in the oven, then collapses as the cheesecake cools, which is where the cracks start. Low-speed mixing is the fix, and it matters more than any fancy water bath here.
The other place people go wrong is baking until the center looks fully firm. That gives you a dry cheesecake that cracks as it cools. You want the edges set and the center to still have a slight jiggle when you tap the pan. It finishes setting in the fridge, which is exactly why this dessert needs a long chill before the fruit goes on.
What Each Ingredient Is Actually Doing in This Flag Cheesecake

- Graham cracker crumbs — These give you a sturdy base that slices cleanly under the filling. If you swap in a different crumb, keep the texture fine and pack it down firmly so the crust doesn’t crumble when you serve it.
- Unsalted butter — This binds the crust and helps it set into a sliceable layer. Melted butter works best because it coats the crumbs evenly; if the mixture looks sandy, it won’t hold together well.
- Cream cheese — This is the backbone of the cheesecake, so full-fat blocks matter here. Spreadable tub cream cheese has too much moisture and a looser texture, which makes the filling softer and more likely to sink.
- Sour cream — It brings tang and smooths out the richness. Greek yogurt can stand in, but the finish will be a little firmer and less silky.
- All-purpose flour — A small amount helps the filling set without turning dense. You don’t want much more than this, or the texture starts to lean toward cake instead of cheesecake.
- Strawberries and blueberries — The fruit topping does more than decorate. Sliced strawberries lie flat enough to build the stripes, and blueberries hold the corner shape of the flag without bleeding much color if you add them right before serving.
Building the Cheesecake So It Sets Cleanly Before the Berries Go On
Pressing the Crust Firmly
Mix the graham cracker crumbs with the melted butter until every crumb looks damp, then press the mixture hard into the bottom of the greased pan. A flat measuring cup or the bottom of a glass gives you a tighter crust than fingertips alone. If the base is loose now, it will break apart when you lift out slices later.
Mixing the Filling Without Whipping Air Into It
Beat the cream cheese and sugar until the mixture looks smooth and fluffy, about 3 minutes, then add the eggs one at a time on low speed. Stop the mixer as soon as the batter turns glossy and even. Overmixing here traps bubbles that rise in the oven and leave you with cracks on top.
Baking to the Right Jiggle
Pour the batter over the crust and smooth the top, then bake until the edges are set and the center still gives a slight wobble when you move the pan. Pulling it at that point keeps the texture creamy instead of dry. If the whole surface looks firm, it has gone too far for this style of cheesecake.
Cooling and Decorating in the Right Order
Let the cheesecake cool completely before it goes into the refrigerator, then chill it for at least 4 hours. That wait is what turns a soft custard into a sliceable dessert. Add the blueberries and strawberries only after it is fully cold, or the fruit will slide around and stain the surface.
How to Adapt This American Flag Cheesecake for Different Pans and Diets
Make it gluten-free with a simple crust swap
Use gluten-free graham-style crumbs in place of the regular ones and keep the butter amount the same. The filling is already gluten-free as written, so this change only affects the base. The texture stays close to the original as long as the crumbs are fine and packed tightly.
Use raspberries if strawberries are too soft or out of season
Raspberries hold their shape well and give you a sharper red stripe, but they are smaller and a little more delicate to arrange. They also add a brighter tart note, which works if you want the cheesecake to taste a little less sweet. Slice strawberries if you want the classic look and a smoother pattern.
Bake it in a springform pan for cleaner sides
A springform pan gives you taller, cleaner slices and makes the cheesecake easier to unmold for serving. A 9×13-inch pan works fine for a crowd, but the slices will be more bar-like and the topping pattern needs a little more care. Use whichever shape fits the party, but keep the bake time flexible and watch the center.
Storage and Reheating
- Refrigerator: Keep covered for up to 4 days. The fruit stays best in the first 24 hours, and the crust softens a little as it sits.
- Freezer: Freeze the cheesecake without the berry topping for up to 1 month, wrapped tightly. Thaw overnight in the refrigerator, then add the strawberries and blueberries before serving.
- Reheating: Don’t reheat this dessert. Cheesecake is meant to be served cold or cool, and warming it breaks the texture and loosens the topping.
Answers to the Questions Worth Asking
American Flag Cheesecake
Ingredients
Equipment
Method
- Preheat the oven to 325°F and grease a 9x13-inch pan. Mix graham cracker crumbs with melted unsalted butter, then press firmly into the bottom of the pan.
- Beat cream cheese and granulated sugar until smooth and fluffy, about 3 minutes. Scrape down as needed so no dry sugar remains.
- Add the eggs one at a time, mixing on low after each addition. Mix only until each egg is incorporated.
- Mix in sour cream, vanilla extract, and all-purpose flour just until combined. Avoid overmixing to prevent cracks.
- Pour batter over the crust and smooth the top. Tap the pan gently to remove large air bubbles.
- Bake at 325°F for 40–45 minutes, until the center is just set with a slight jiggle. Turn off the oven and leave the cheesecake inside for 5 minutes to reduce surface shock, then remove.
- Cool completely at room temperature. Refrigerate for at least 4 hours to fully set.
- Before serving, arrange blueberries in the top left corner. Place strawberry slices in rows across the rest to create a flag pattern.