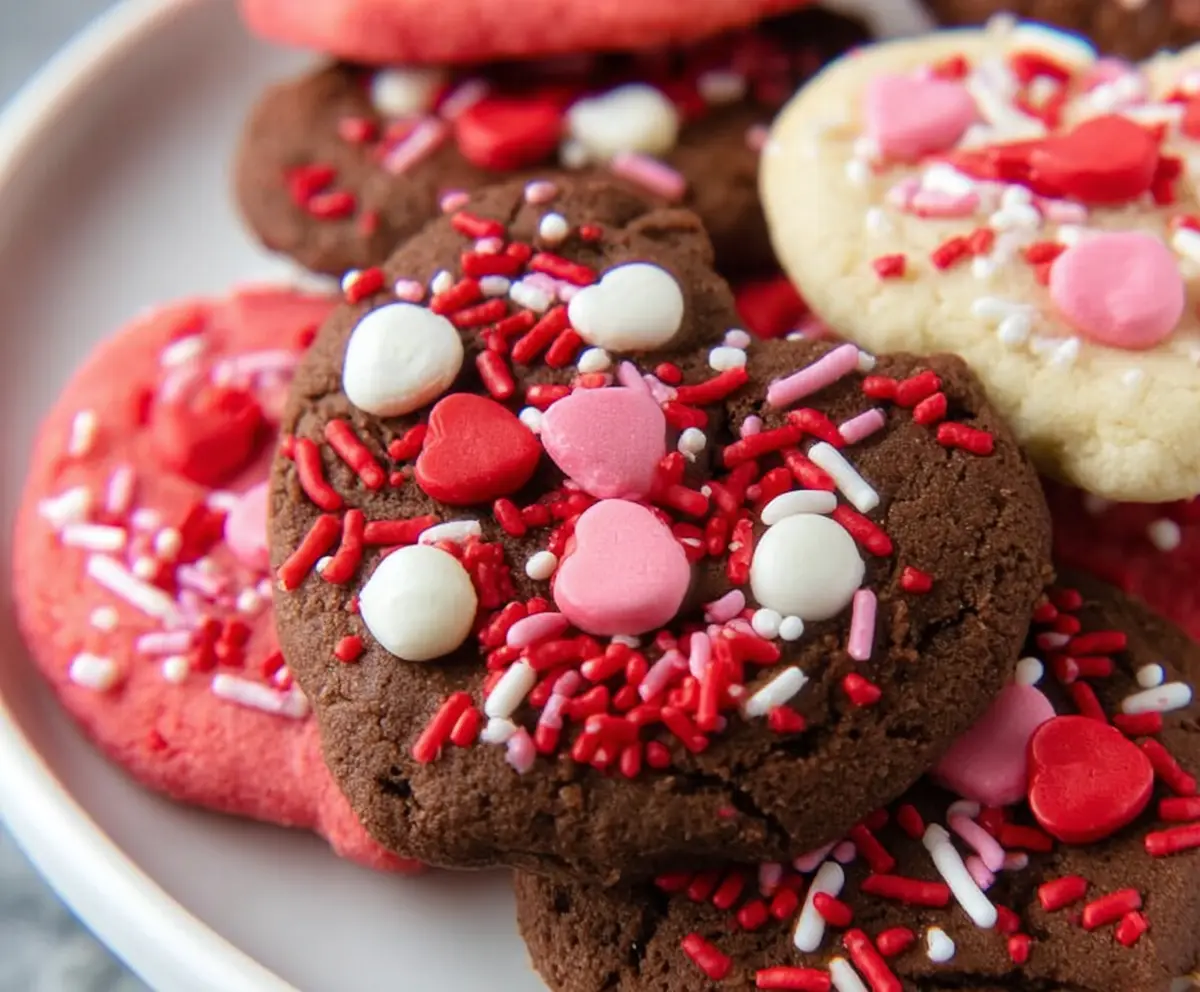
These sweet Valentine cookies are perfect for sharing with loved ones. Soft, buttery, and topped with colorful sprinkles, they’re sure to make hearts melt!
Baking these cookies is a great way to show someone you care. I love making a big batch and decorating them with fun designs. Who doesn’t love a treat that looks as sweet as it tastes? ❤️
Key Ingredients & Substitutions
Unsalted Butter: Softened butter is essential for a tender cookie. If you’re out of butter, you can substitute with room temperature coconut oil or margarine, but the flavor will vary a bit.
Granulated Sugar: This is crucial for sweetness and helps create a nice texture. You can replace it with brown sugar for a deeper molasses flavor or a sugar substitute like erythritol for a low-calorie option.
Cocoa Powder: If you want a rich chocolate flavor, use unsweetened cocoa powder. You could also try Dutch-processed cocoa for a smoother taste. However, if you prefer not to use cocoa, simply skip it and stick to the sugar cookie version!
Food Coloring: Pink food coloring gives that festive vibe. Use gel food coloring for vibrant results. If you want to avoid artificial coloring, try beet juice for a natural pink hue.
Decorating Icing: I used store-bought icing for convenience, but homemade royal icing adds a nice touch. If you’re short on time, sprinkle with powdered sugar instead.
What’s the Best Way to Chill Cookie Dough?
Chilling the dough is crucial for shaping and baking cookies perfectly. It helps them hold their shape while baking and improves the texture. Here’s what to do:
- Wrap each dough tightly in plastic wrap to prevent drying out.
- Refrigerate for at least 1 hour; you can chill it overnight for even better flavor.
- When ready, let the dough sit at room temperature for 5-10 minutes for easier rolling.
Chilling not only improves the texture but also enhances flavors as the ingredients meld together, making your cookies even more delicious!
Valentine Cookies
Ingredients You’ll Need:
For the Cookie Dough:
- 1 cup (2 sticks) unsalted butter, softened
- 1 cup granulated sugar
- 1 large egg
- 1 teaspoon vanilla extract
- 2 1/2 cups all-purpose flour
- 1/2 cup unsweetened cocoa powder (for chocolate cookies)
- 1/2 teaspoon baking powder
- 1/4 teaspoon salt
- 1-2 tablespoons milk (if needed)
For the Decoration:
- Pink food coloring (for pink dough)
- Assorted Valentine-themed sprinkles (heart-shaped, red, white, pink)
- White and red decorating icing or frosting
How Much Time Will You Need?
This recipe takes about 20 minutes to prepare, and you should allow at least 1 hour for chilling the dough. Baking will take an additional 8-10 minutes. So, plan for around 1.5 hours total from start to finish, but the fun decorating can stretch that out!
Step-by-Step Instructions:
1. Prepare the Dough:
Start by creaming the softened butter and granulated sugar together in a large mixing bowl until the mixture is light and fluffy. This may take a few minutes. Next, beat in the egg and vanilla extract until everything is well combined.
2. Make Two Doughs:
In a separate bowl, whisk together the flour, baking powder, and salt. Divide this mixture into two portions: about two-thirds for the chocolate dough and one-third for the pink dough. Add cocoa powder to the larger portion and mix well. Gradually combine this dry mix into the butter mixture—first add the chocolate portion and then the pink portion. For the pink dough, add a few drops of pink food coloring and a tablespoon of milk. Mix until you achieve an even color and smooth texture. If the dough feels too dry, mix in a little more milk until it’s manageable.
3. Chill the Dough:
Wrap both doughs separately in plastic wrap and refrigerate them for at least 1 hour. This step helps the cookies hold their shape while baking, so don’t skip it!
4. Shape the Cookies:
Once chilled, preheat your oven to 350°F (175°C). Roll out each dough on a lightly floured surface to about 1/4-inch thickness. Use heart-shaped cookie cutters to cut out cookies from both doughs. Place the cookies on a parchment-lined cookie sheet, leaving space between each one.
5. Bake:
Bake the cookies in your preheated oven for 8-10 minutes, or until the edges are just set. Let the cookies cool on the baking sheet for about 5 minutes before transferring them to a wire rack to cool completely.
6. Decorate:
Once the cookies are completely cool, it’s time to get creative! Using white and red icing, pipe little hearts and swirls onto the cookies. Then, sprinkle a cheerful assortment of Valentine-themed sprinkles on top. Allow the decorations to set before serving or packaging.
7. Serve and Enjoy:
Arrange your beautifully decorated cookies on a festive plate or package them up as gifts for loved ones. Enjoy them with a cozy cup of tea or hot chocolate on Valentine’s Day!
These Valentine cookies feature both chocolate and pink varieties decorated with sweet heart designs and colorful sprinkles, making them perfect for sharing and celebrating love!
Can I Use Margarine Instead of Butter?
Yes, you can substitute margarine for unsalted butter if needed. Just ensure it’s softened for easier mixing. Keep in mind that the flavor might differ slightly, but the cookies will still turn out delicious!
What if My Dough Is Too Sticky?
If your dough is too sticky to roll out, try chilling it a bit longer in the fridge, or add a little more flour, a tablespoon at a time, until it reaches a workable consistency. Just be cautious not to add too much flour, which can make the cookies tough.
How Should I Store Leftover Cookies?
Store any leftover cookies in an airtight container at room temperature for up to 5 days. If you want them to last longer, you can freeze them for up to 3 months. Make sure to separate layers with parchment paper and seal them tightly to prevent freezer burn!
Can I Make These Cookies Gluten-Free?
Absolutely! You can substitute all-purpose flour with a gluten-free flour blend. Just make sure the blend you choose includes a binding agent, like xanthan gum, to achieve the right texture. Follow the recommended measurements on the gluten-free flour package for the best results.